- Download the .exe installer:
for x64 Windows - https://www.dssl.ru/files/trassir/postgresql-9.3.4-3-windows-x64.exe
for x32 Windows - https://www.dssl.ru/files/trassir/postgresql-9.3.4-3-windows.exe - Launch the installer and click Next > in the opened window.

- Select the database installation folder and click Next >.

- After that select the folder that contains the DBMS files. Click Next > to continue.

- In the next step, enter the DBMS's superuser's password. Click Next > to continue.
 We strongly recommend that you memorize or write down the superuser's password. This password is required to configure the database connection and create a backup copy if the DBMS is moved to a different server.
 - If needed, you can change the DBMS connection port. Click Next > to continue the installation.

- In the next stage, select the country in the Locale field. Click Next > to continue the installation.

- Click Next on the next screen and wait for the installation to complete.

- When the installation is complete, clear the Launch Stack Builder at exit? checkbox and click Finish.

- Launch pgAdmin III software
- Double-clik on (localhost:[port]) server:

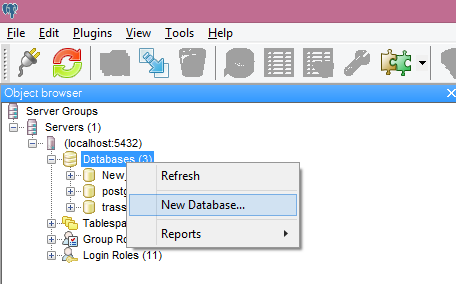
- Select Databases in the tree and select New Database... in the context menu
- In the window that opens, in the Properties tab, enter the parameters Name (can be any), Owner - postgres:

- Launch Trassir Server
- Open the Settings window.
- Select Database in the list of settings.
- Specify the connection settings:
- Server type - Leave this as "PostgreSQL".
- Host - The IP address or DNS name of the server where the databases installed. If the databases installed locally, then leave the value as localhost.
If the database is installed on different server, then be sure your IP address is in the list of authorized address for external connections.
- Port, Database Name, Username, Password - The parameters that were specified for the database when it was installed (look at previous paragraphs of this article).
- Keep records for - The period of time for which old events will be stored before being overwritten by new events.
- Verify that the connection was established successfully ("Connected" will appear in the Current state: field).

If the connection cannot be established, then the Current state: field will contain an error message containing the reason why the connection failed. For example, the connection failed in this case, because the database name was not entered correctly:

Обзор
Инструменты контента